Taxonomies addition for products in WooCommerce
Wise2Sync module imports and creates WooCommerce product attributes.
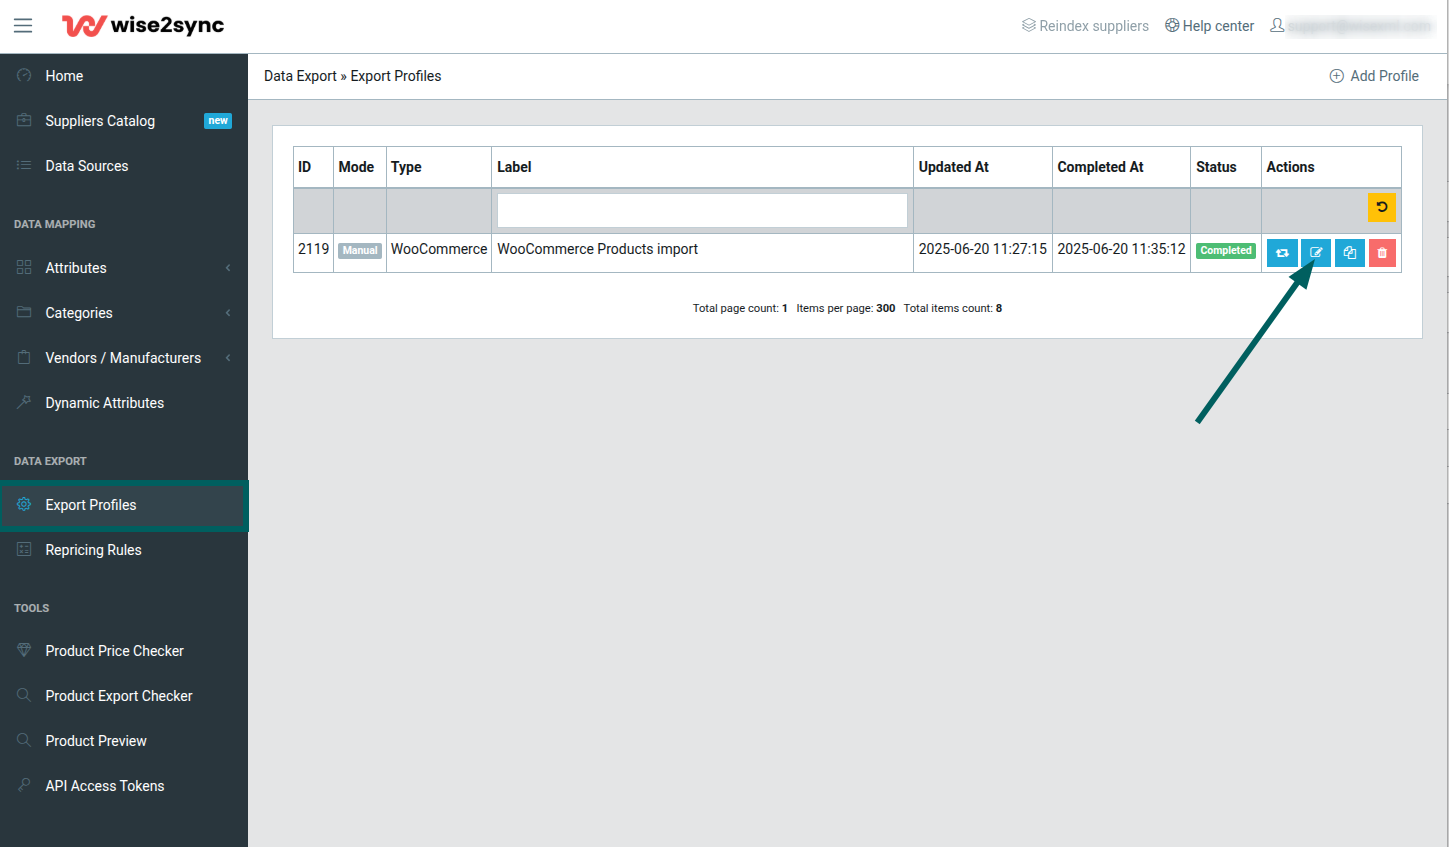
Step 1. Open export profile in Wise2Sync app:
Step 2. Select Template
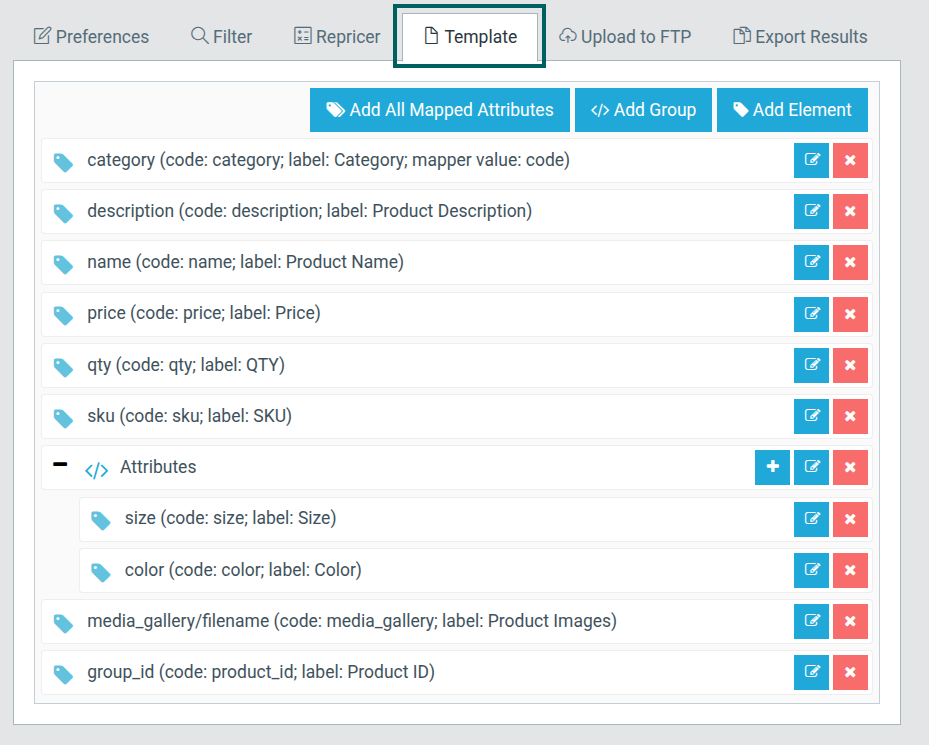
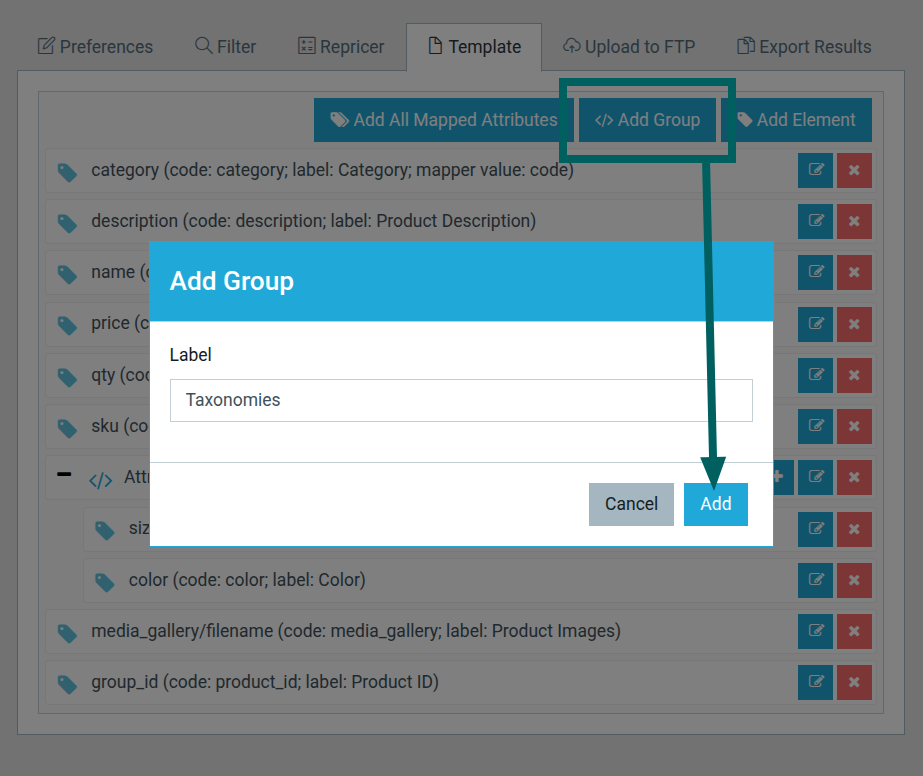
Step 3. If the template is missing the group "Taxonomies" - create one:
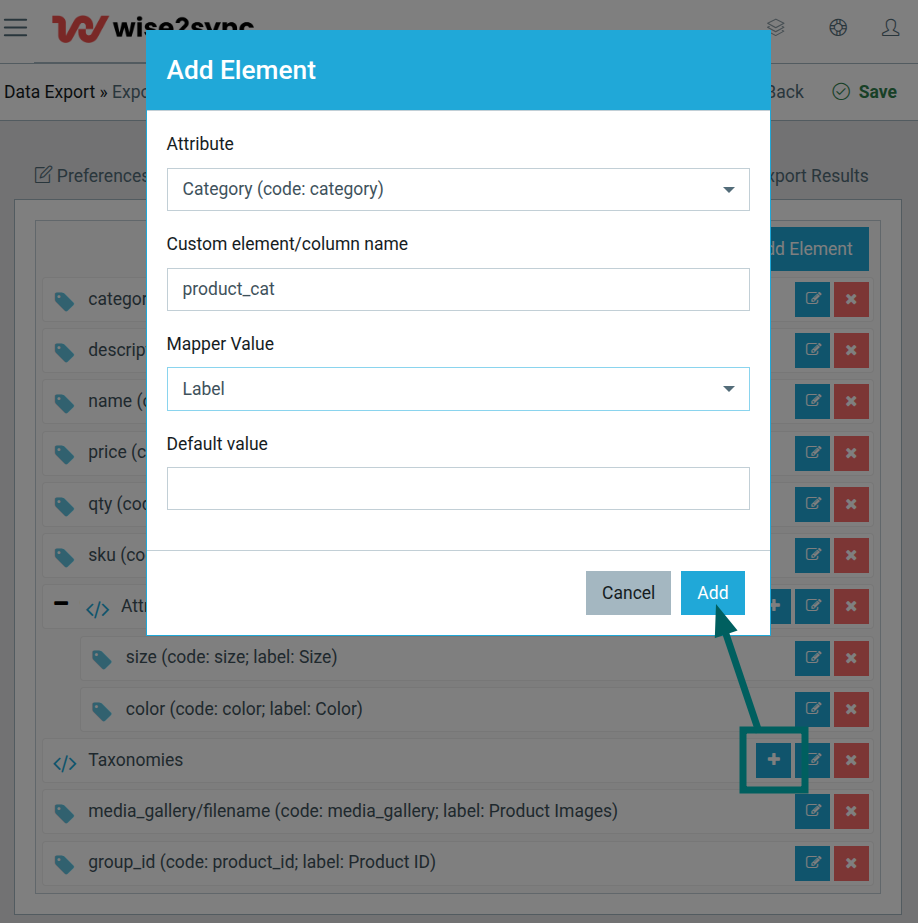
Step 4. Add taxonomies for product:
field meanings:
Attribute - select an attribute from the list.
Custom element/column name - taxonomy slug in WooCommerce; Look for more information.
Mapper Value : [Code] - Your assigned value, [Label] - Your assigned label.
Default value - value that will be applied to all products, eg, "Red".
Step 5. Once you have added all taxonomies, save the export profile.
When the export file is ready (at Wise2Sync App) the import is completed in your WordPress site.
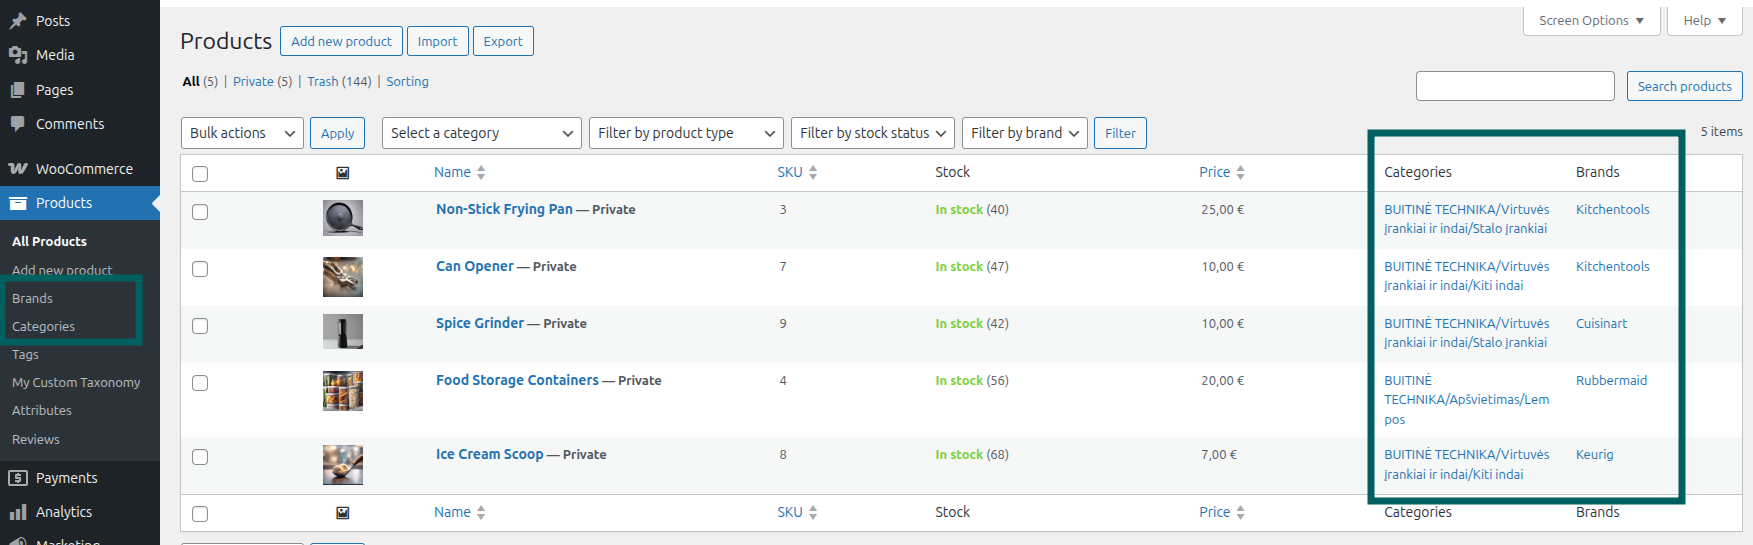
Open the Product list and select the imported product. You should see the newly added taxonomies:
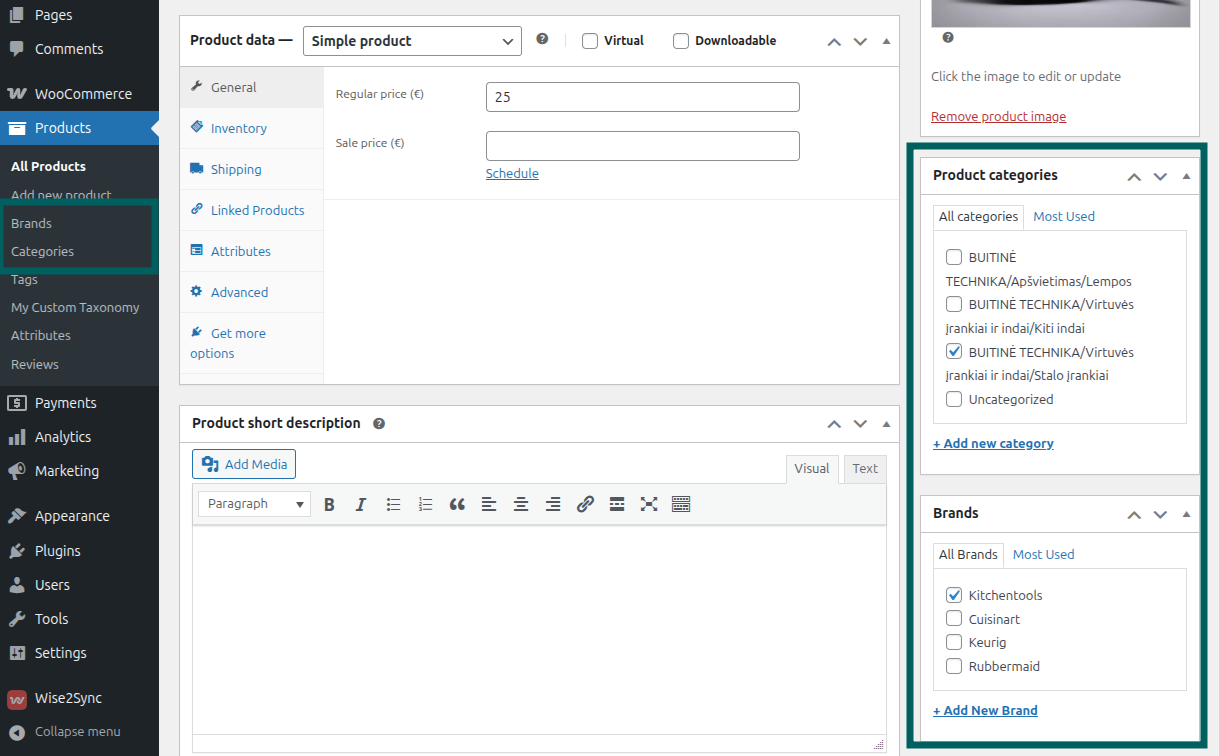
and you might see them here too:
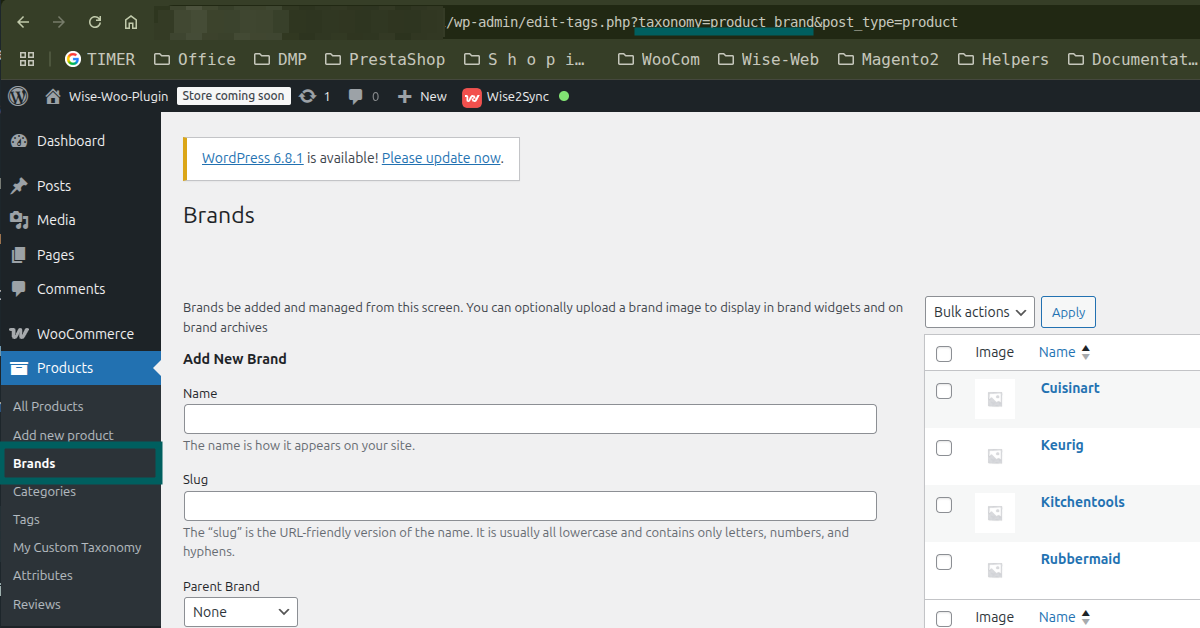
What taxonomy name to choose?
Taxonomies can be found here: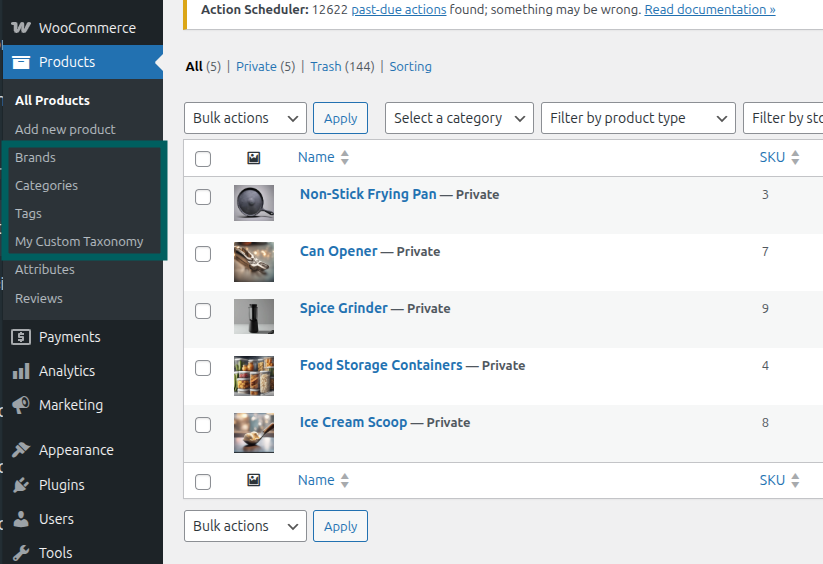
For the export template, we must use the taxonomy slug, which can be found in the selected taxonomy URL:
So for taxonomy Brand, you must use slug: product_brand
http://wordpress-shop/wp-admin/edit-tags.php?taxonomy=product_brand&post_type=product