Setting up product export from WooCommerce to Wise2Sync
In this article, we will explain how you can configure your Wise2Sync connector to export products to Wise2Sync. This is done after you have installed the extension - make sure you've set up a CRON.
Once you install the Wise2Sync module go to Wise2Sync -> Export profiles and create a new export profile:
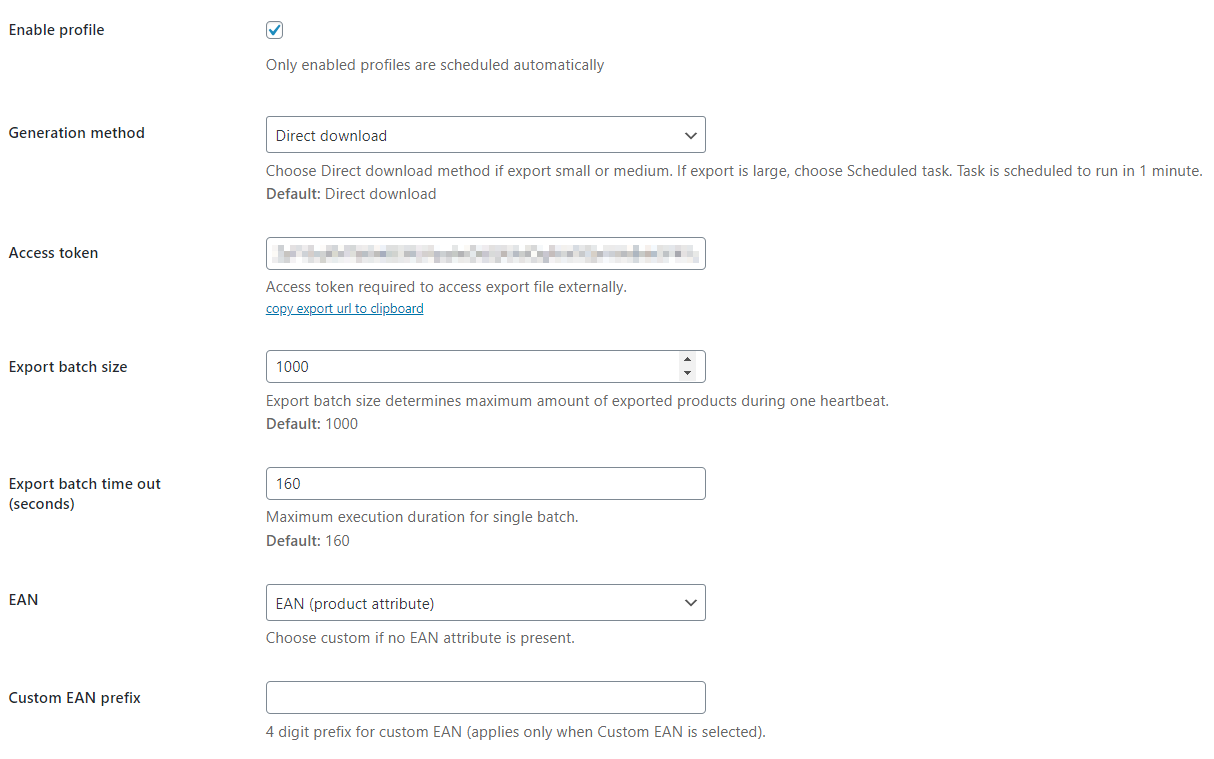
- Name the export profile (f.e. All products export)
- Click "Enable profile"
- Select "Generation" method. There are two types of methods:
- Schedule task – the export task is scheduled to run within a minute after creation. This is a recommended export mode.
- Direct download – the export starts immediately. Recommended for small/medium capacity exports or for testing purposes.
- Run time (applies when the "Schedule task" method is chosen). Set the frequency of how often you want to generate your product file. We recommend once / twice a day (depending on your chosen Wise2Sync price plan). The default value is
0 0 * * *which means that your products will be pushed to Wise2Sync once per day at midnight. Please read more on how to navigate the CRON job here.
The access token will be generated automatically.
Click to generate your report immediately. Once this is done - copy the export URL to the clipboard and paste it in your browser.
If all is good - your browser will download your products feed file.
Definitions Explained
- Export batch size - if you have a slower server you can change this value to a smaller one to keep great performance.
- EAN – if you have EAN on your WooCommerce store and it corresponds to EAN product attribute code, select EAN (product attribute). Otherwise, select the „Custom“ option.
- Custom EAN prefix - you can enter 4 digits for the custom EAN prefix (required if custom EAN is selected).
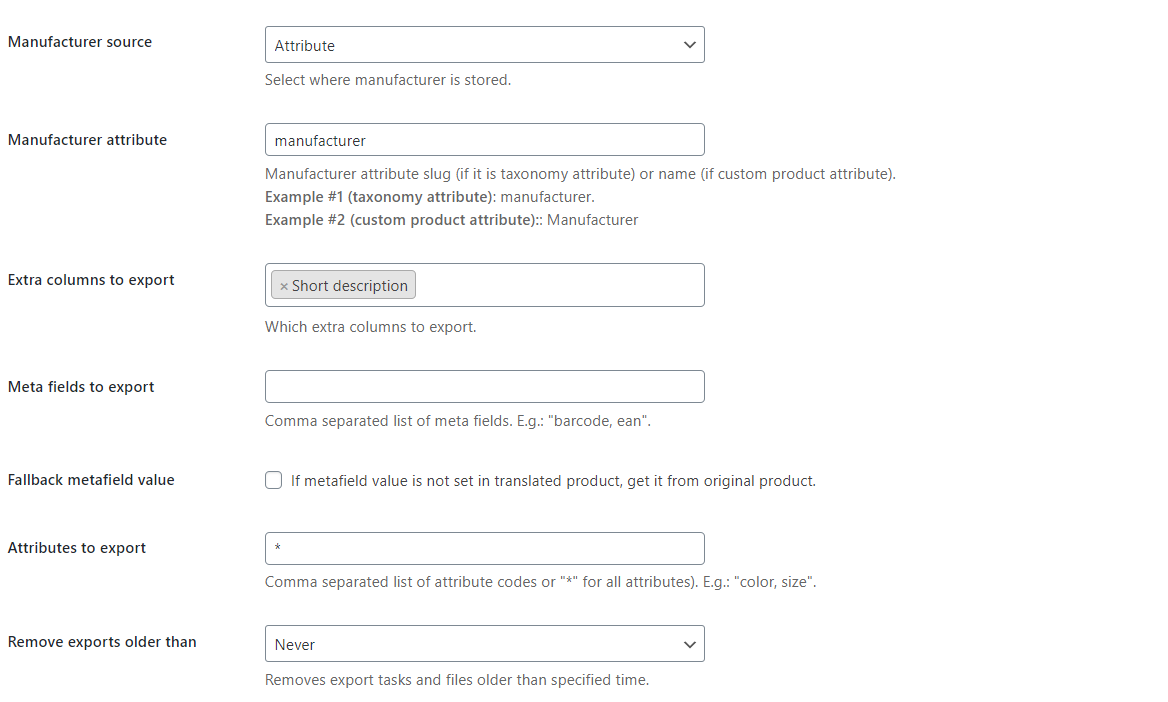
- Manufacturer source - select where manufacturer is stored. It could be product attribute (visible under Products -> Attributes), taxonomy (visible under Products) or meta field.
- Manufacturer attribute (if source is attribute) – enter attribute slug which corresponds to the manufacturer.
- Manufacturer taxonomy (if source is taxonomy) - select taxonomy which corresponds to manufacturer.
- Manufacturer meta field (if source is meta field) - enter meta field key.
- Extra columns to export – select with additional columns to include in the export. We recommend exporting all columns.
- Attributes to export - enter the attribute slugs which will be exported, or you can choose to export all attributes by entering * (wild card). We recommend exporting all attributes.
- Meta fields to export - enter custom field keys (known as meta fields in Wordpress). Format: keys separated by comma. Example: ean_code,custom_description.
- Remove exports older than – select when old export files are removed from the server (to free up space).
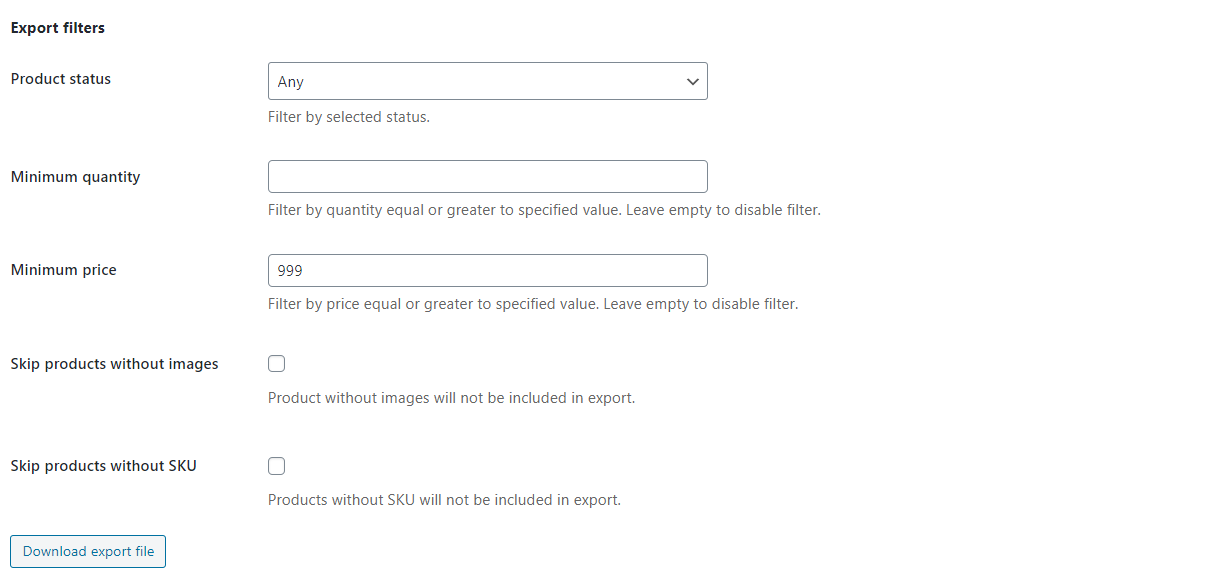
Export filters
- Product status – filter products by status (published, private, draft, or any).
- Minimum quantity – filters products by minimum quantity*.
- Minimum price – filter products by minimum price*.
* equal to or greater than a specified value
When the export file is deleted, all related tasks and export files are deleted as well.
You can also go to Wise2Sync → Export files to view and download the generated export files.
-1-(2).png)


