WooCommerce categories mapping
To map the product categories you will have to create your categories list in the WooCommerce plugin.
Step 1. Create your Category list in Woocommerce
First, you need to create categories in WooCommerce. Go to Products → Categories and click "Add new category".

Before you start - review this article to understand how category mapping in Wise2Sync works.
Step 2. Get WooCommerce Category ID
Once you created your categories, you'll need to map them with the categories in Wise2Sync. You can find a Category ID in the WooCommerce URL. In Products → Categories and open a category. See the URL, which holds the category ID (in this example, ID is 16):
https://yourdomain.com/wp-admin/term.php?taxonomy=product_cat&tag_ID=16&post_type=product
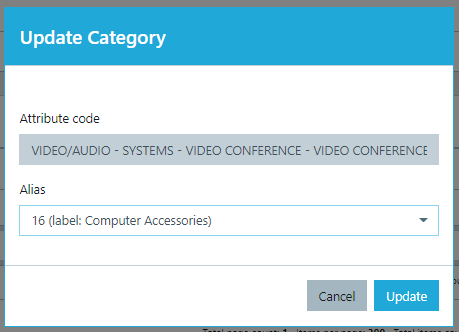
Step 4. Create Categories in Wise2Sync
Open Wise2Sync connector https://app.wise2sync.com
ID - enter the Category ID we copied in Step 1 ("16" in our case)
Label - the name of the Category (it can be the same as the Category name in Woocommerce.

You can repeat these steps multiple times for all categories. Or first create all categories in WooCommerce and then recreate them in Wise2Sync.
Step 5. Map supplier categories in Wise2Sync
Repeat the steps above to map all your products' categories.
If you are not sure how the categories mapping works get in touch and we will help you! Contact us at support@wise2sync.com