Setting up product import from Wise2Sync to Magento 2
Magento2 connector supports product export and import. This article explains how to import products from Wise2Sync to your store.
Wise2Sync configuration
After you have logged in to your https://app.wise2sync.com/ account, navigate to "Export profiles". Create an export profile with the filters and repricing rules for the products that you want to push to your Magento 2 platform.
Categories will not be created automatically by our plugin! You should create them in Magento 2 first. While mapping categories keep in mind that you should use the same path as in Magento 2.
The template will look like this:
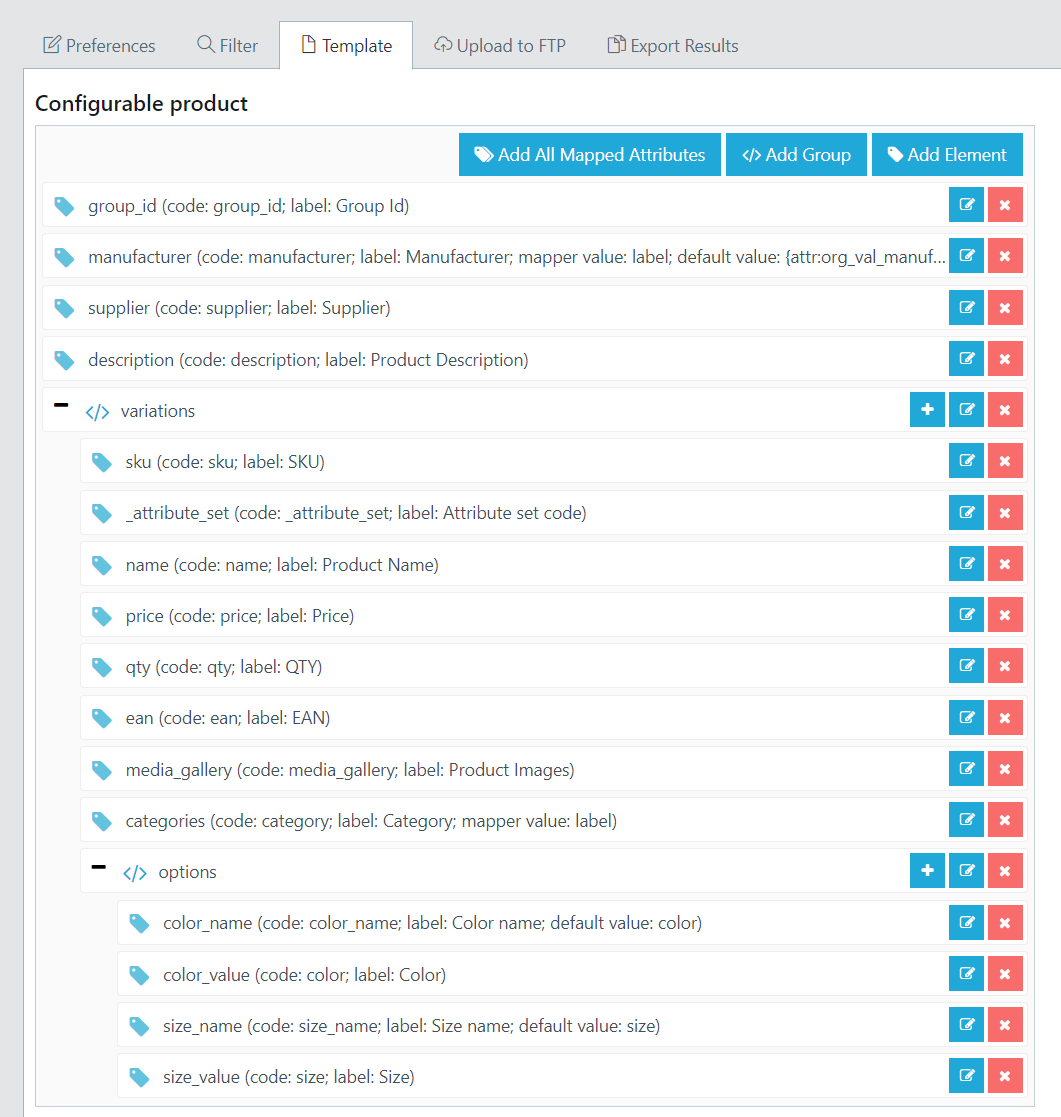
It is suitable for both simple and configurable products!
After you are done customizing your template, click Save and go back to the export profiles list.
Before the next step make sure that you filtered out products for testing purposes. We recommend adding 2-3 products by SKU or EAN to the filter and first checking them out before importing a lot more products.
Click the "Queue" icon to generate the export file:

Congrats, now you have prepared export profiles in the Wise2Sync account.
Connector configuration
The following options are to be done on the Magento 2 side after you have installed Wise2Sync connector.
We recommend making a backup of your existing store before making product imports/exports on LIVE website. The best practice is to perform testing on STAGING version of your site and then apply them on LIVE.

- Enable profile - enable / disable
- Import mode - choose one of the import modes depending on how importer should behave.
"Create new and update existing products". This mode will create new products and update existing products. Any manual product modifications will be overwritten.
"Update existing products". This mode will only update already existing products.
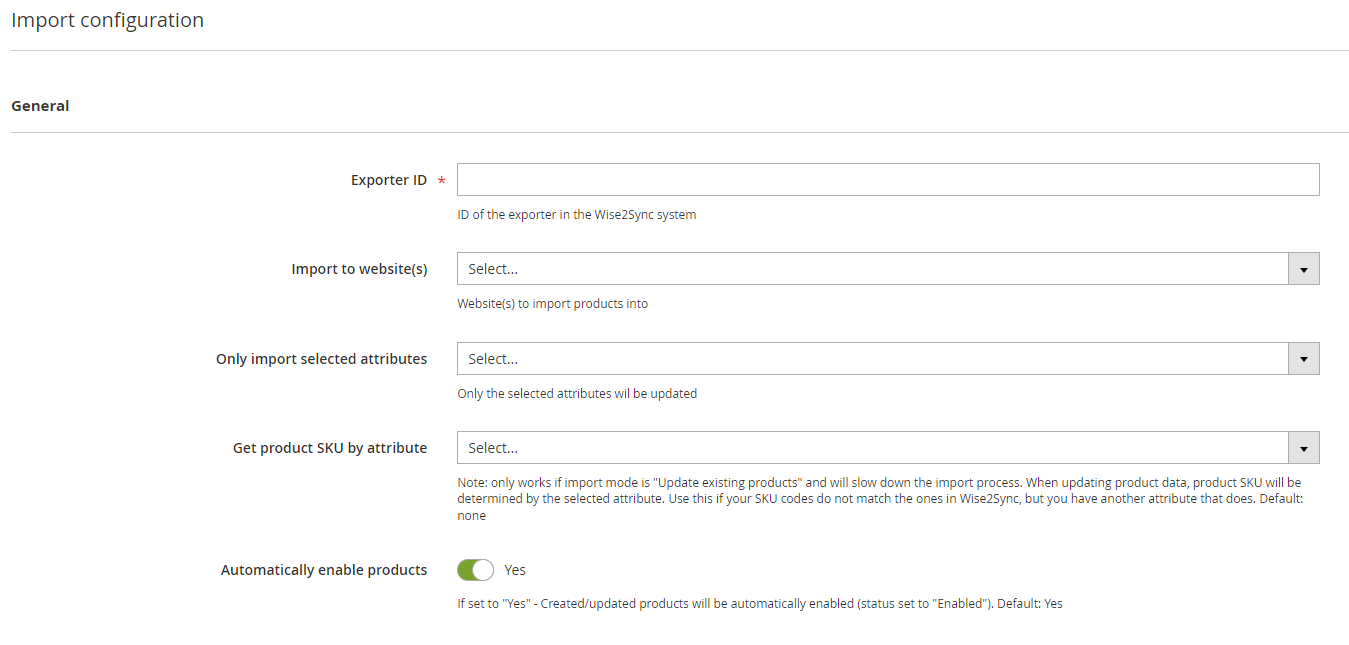
- Exporter ID - you can find it on your Wise2Sync account -> Export Profiles first column.
- Import to website(s) - if you have multiple websites for the same admin you can choose which one to use.
- Only import selected attributes - if you do not need all attributes from the template you can select only needed ones.
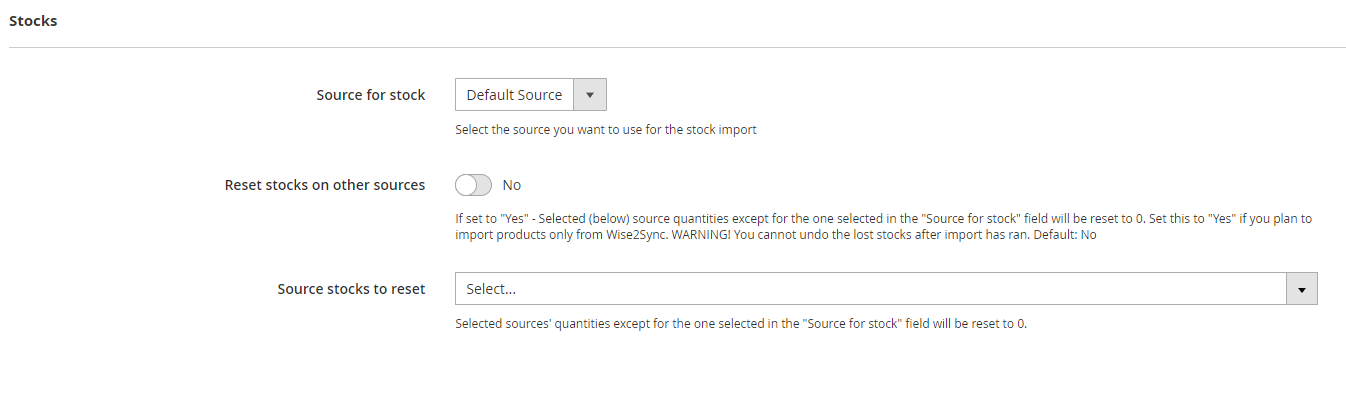
- Source for stock - if you use multiple Stock sources you can select which one you need.
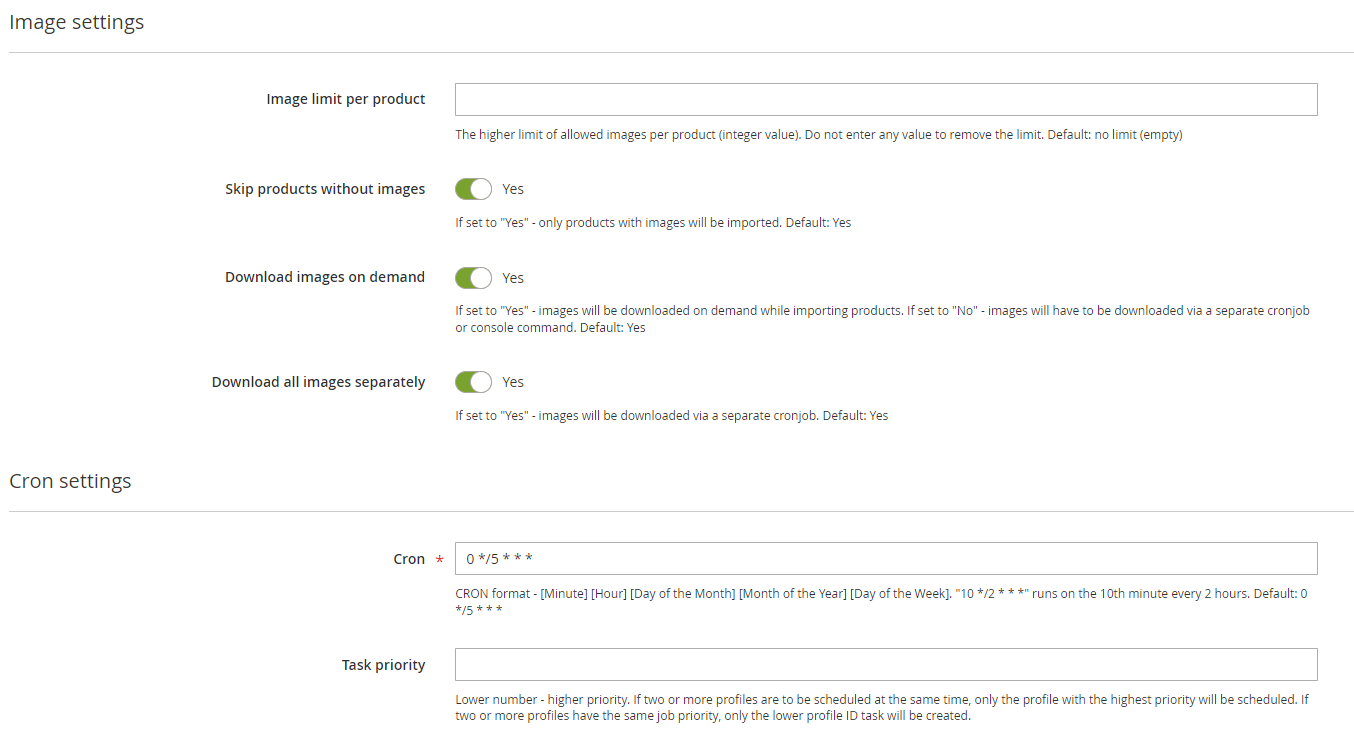
- Image limit per product - if the supplier provides a lot of images you can limit them to improve performance.
- Cron - insert CRON expression describing when the import is run.
Import Configuration
You will find additional settings there:

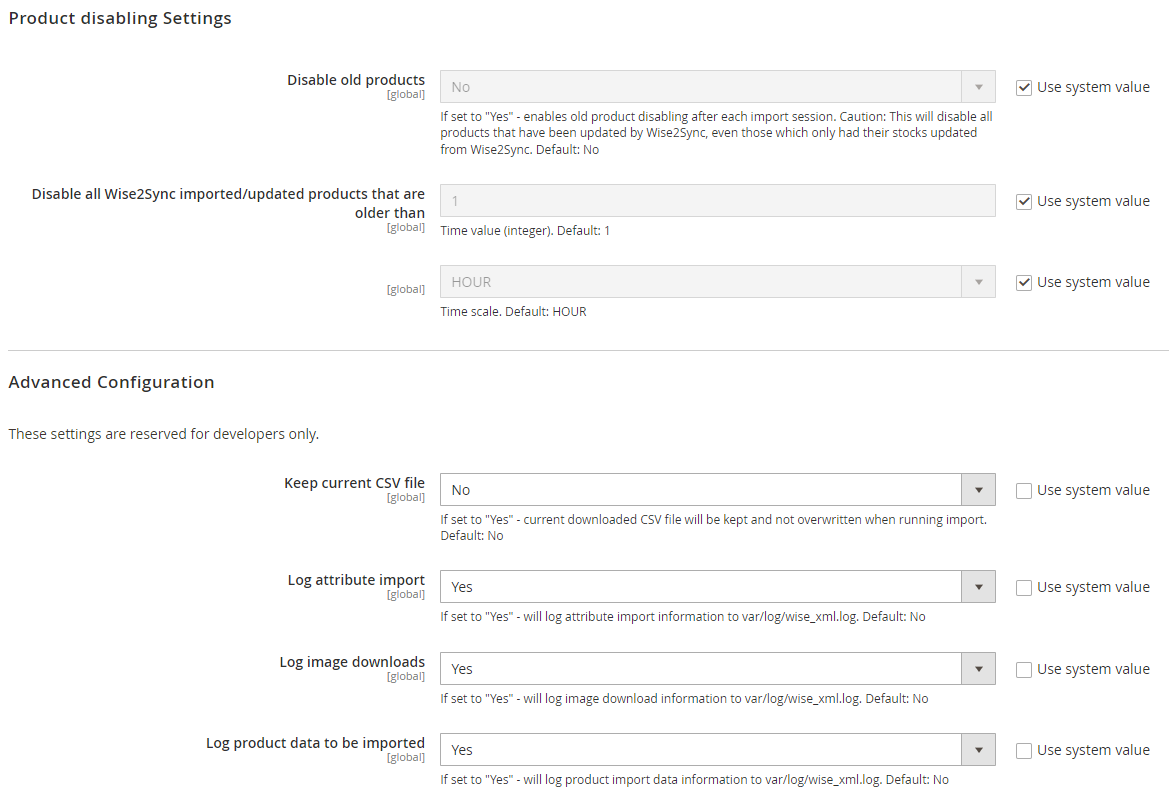
- Access Token - you can find it on your Wise2Sync account under the API Access Tokens tab in the bottom left corner.
- Product disabling Settings - if you want to use this setting make sure you choose the right amount of time (default value is No). We recommend enabling it and disabling products older than one month.
Import Tasks
Located in Wise2Sync → Tasks.
Tasks are key elements in the Wise2Sync plugin. Import and export processes are encapsulated in tasks. Tasks allow monitoring processes. You can see your profile name, status, how many products were imported, and when the task started and ended.