Data Mapping
Everything about attributes mapping: categories, manufacturers and product data.
- Category Mapping
- Attribute Mapping
- Vendors / Manufacturers auto-mapping
- Category Import / Export
- Category Set
- Setting category priorities
Category Mapping
Same as with product brands, category mapping is needed to standardize your products catalogue. This is used to make sure products from different data feeds fall into the same category tree.
We created a short video with examples - Wise2Sync - Category Mapping.
Manual category mapping
Step 1. Create your categories list
Before you start mapping categories, you need to create your own category list. If you are starting fresh, we recommend creating a categories list first in a spreadsheet. Give categories some meaningful names, like:
- Accessories / Mouses
- Accessories / Keyboards
- Computers / Laptops
- Computers / Desktops
- ...
Once you know your categories tree, navigate to Data mapping → Category mapper → My categories and click "Add category".
A pop-up will appear, where you can enter two values:
- ID - identification number of the category. Can be any unique number or text. This will be a unique identifier for a category. You will not be able to change this later.
- Label - enter the name of the category. You will be able to change this later also.
Click "Create" and your new category is saved.
If you have a list of categories from your existing store, you can use Auto category mapping feature and import the filled-in CSV.
Step 2. Map categories
- Choose a data source (supplier) tab
- Find a category you want to map
- Click on Edit icon in the corresponding row and a pop-up will open:

Use the Alias field to find your created category in Step 1.
Some product feeds or suppliers have very extensive categories of trees. Sometimes it can reach 1000 and more categories per supplier/data feed. You can use a bulk attribute mapper to speed up the process:
- Use the search field to narrow the categories list
- Select desired categories
- Choose the "Edit" action and click "Submit".
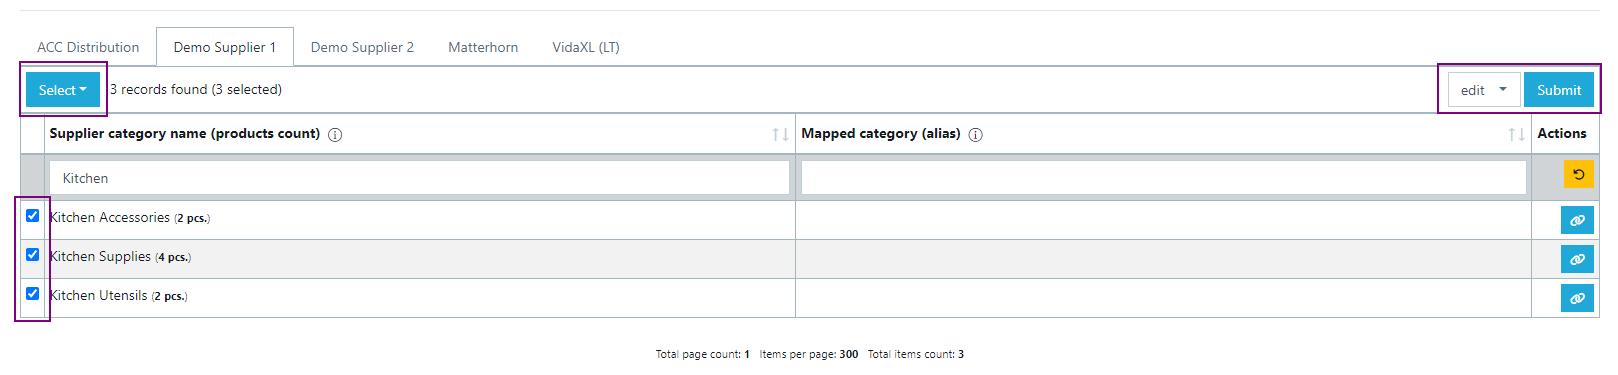
All the selected categories will be mapped at once.
You can see how many products each supplier category has just by checking out the number in brackets near each category name.
Auto category mapping
Step 1. Download CSV file with supplier categories list.
The fast way to map all categories is to import them. Before you start importing categories, you need to download the supplier category list from Wise2Sync. Navigate to Data mapping → Category mapper → Supplier categories. Here you will see a list of all categories that Wise2Sync has found in suppliers feeds. All categories are also split by data sources. In CSV file with categories, you will see column supplier name so you will be able to map all categories from all data sources at once.
- Press Import/Export icon on the top right corner
- Click on Export and a pop-up will open
- Choose default if you have not created any category sets yet and press export:


Step 2. Map your categories with supplier categories in CSV file.
Columns Supplier name and Supplier category must stay the same. Make changes only in Client category code and Client category label columns. If you use Shopify or Woocommerce in column Client category code put category ID. Check Woocommerce and Shopify category mapping. For other platforms, you can use the same category name in both columns.

Step 3. Import your categories.
After you are done with your categories mapping in CSV file you can import it. Navigate to Data mapping → Category mapper → Supplier categories.
- Press Import/Export icon on the top right corner
- Click on Import and a pop-up will open
- Choose default if you have not created any category sets yet and press Upload CSV file:
- Select file you want to import (be sure you choose the right file because after import you will not be able to redo changes) and press Import:

You will see if the file was uploaded successfully and categories mapped as in CSV file.

After you are done mapping you will be able to use your categories for product filtering, price margins etc.
Attribute Mapping
By default, Wise2Sync maps main product information like brand, manufacturer, price, stock level etc. However, additional product information like delivery terms, weight, dimensions etc. can be useful in your export as well. In this article, we will explain how to map these attributes so this data can be used in export profiles.
Step 1. Create a desired attributes list
Navigate to Data mapping → Attribute mapper → My attributes. Here you will see a list of already mapped attributes. Click "Add attribute" and a pop-up will open:
- Attribute code - unique identifier (ID, code, or any other value, that can be used for import
in your sales platform). You can make this the same as Label. - Label - usually a text value, the name of the Attribute you will see in export profiles
- Type - choose "Text" for text type values (for e.g. "3-5 days", "Coming soon"), or "Number" for numeric values (for e.g. 9.000)

After you click "Create" a new attribute will be saved. Repeat this step for all desired attributes.
Step 2. Map attributes
Navigate to Data mapping → Attribute mapper → Supplier attributes where you will see all possible product attributes from your suppliers / data feeds. Column alias shows the connection between supplier attributes and your attributes. Notice the price, stock etc. are already mapped.
Use a search field to find the desired attribute and click the Edit icon in the corresponding row. A pop-up will open. Use "Alias" field to find an attribute you created in Step 1.
Another way of mapping attributes is to do it straight in Product Preview. Navigate to Product Preview and press the Inspect Product button on the right. A window with all the attributes that the product has will open.
Do not forget to follow Step 1 of this article to create your attributes first.
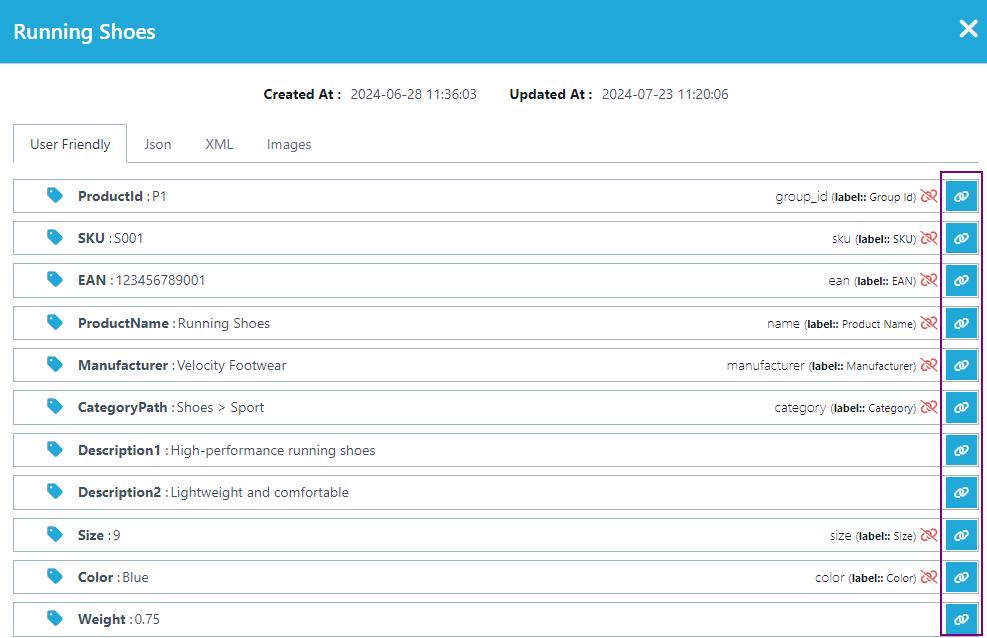
On the right you can see attributes mapping buttons and already mapped attributes. You can map desired information or unmap what you do not need.
Vendors / Manufacturers auto-mapping
This feature will speed up the Manufacturer mapping procedure. It would collect all available manufacturers / brands from your suppliers and will create related records in the Wise2Sync app.
Go to Wise2Sync → open “Supplier Manufacturers” → click on “Auto map manufacturers” button in the top right corner.
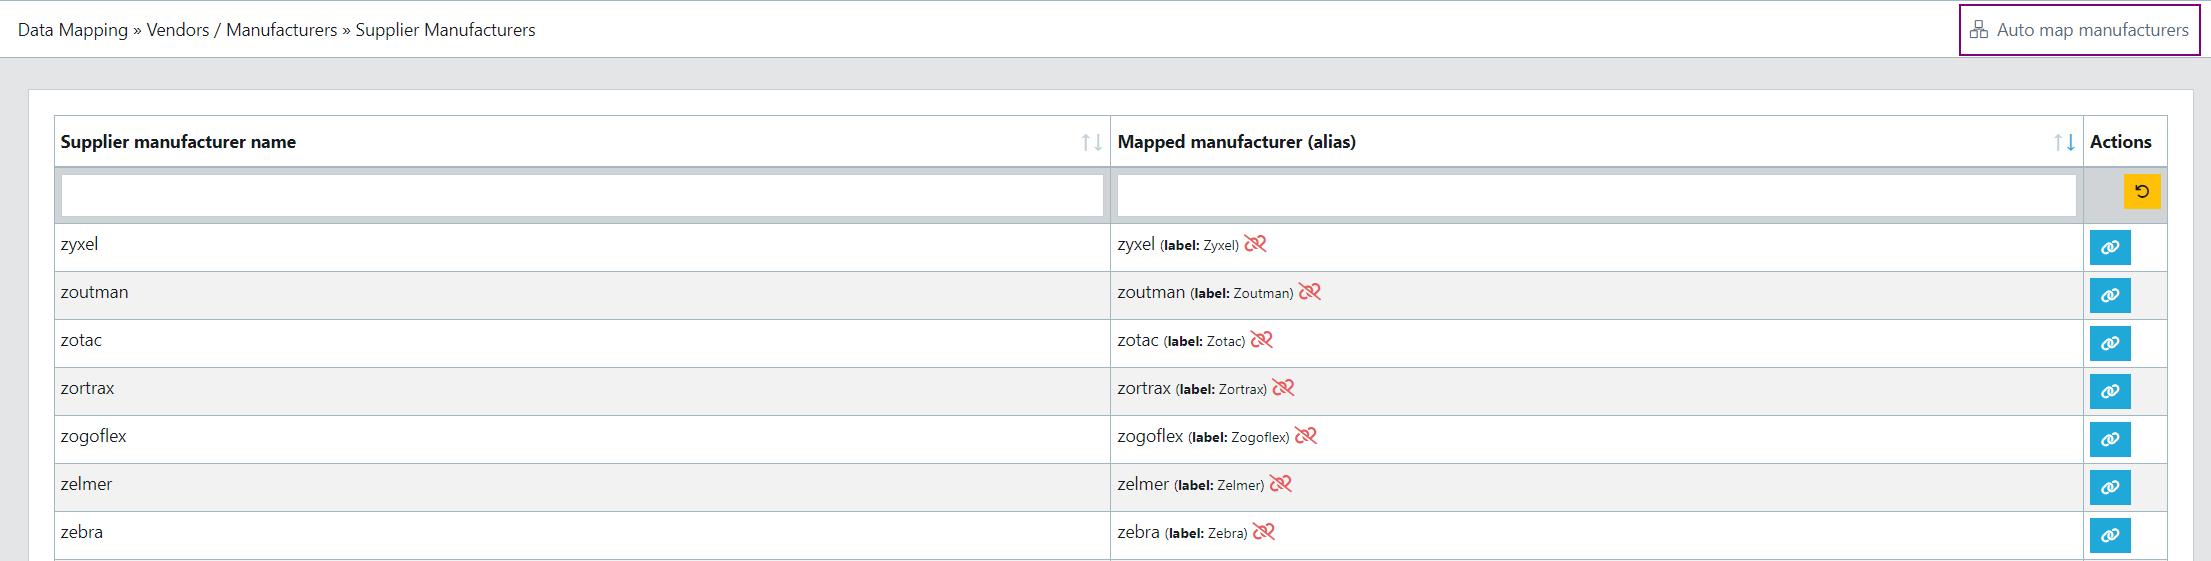
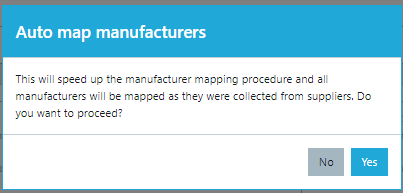
The message will pop up prompting you to click “Yes” option. Once you click on "Yes” option all your manufacturers will be collected and mapped.
You can adjust mapping manually by unmapping unnecessary brands or mapping missing ones.
In the tab "My Manufacturers" you can see that all values were created automatically, you do not need to create them manually. However, you can edit Labels if needed.
After you are done with your mapping, you can use manufacturer attributes for pricing rules, product filtering, etc.
Category Import / Export
Here we will show you how to import your own categories. If you have a list of categories from your existing store, you can import them using CSV file.
Step 1. Download CSV file with supplier categories list.
Before you start importing categories, you need to download the supplier category list from Wise2Sync. Navigate to Data mapping → Category mapper → Supplier categories. Here you will see a list of all categories that Wise2Sync has found in suppliers feeds. All categories are also split by data sources. In CSV file with categories, you will see column supplier name so you will be able to map all categories from all data sources at once.
- Press Import/Export icon on the top right corner
- Click on Export and a pop-up will open
- Choose default if you have not created any category sets yet and press export:
Step 2. Map your categories with supplier categories in CSV file.
Columns Supplier name and Supplier category must stay the same. Make changes only in Client category code and Client category label columns. If you use Shopify or Woocommerce in column Client category code put category ID. Check Woocommerce and Shopify category mapping. For other platforms, you can use the same category name in both columns.
Step 3. Import your categories.
After you are done with your categories mapping in CSV file you can import it. Navigate to Data mapping → Category mapper → Supplier categories.
- Press Import/Export icon on the top right corner
- Click on Import and a pop-up will open
- Choose default if you have not created any category sets yet and press Upload CSV file:
- Select file you want to import (be sure you choose the right file because after import you will not be able to redo changes) and press Import:
You will see if the file was uploaded successfully and categories mapped as in CSV file.
After you are done this you will be able to use your categories for product filtering, price margins etc.
Category Set
Category sets are useful to use when there is more than one export profile used for different webshops.
Once the categories are created and mapped as per steps in this article Category Mapping. For the new export files that go to a different website, the categories set need to be created:
Go to the Wise2Sync dashboard and choose the "Category Set" option:

In the "Category Set" page click the "add category set" option, on the right-hand side top corner. The window will pop up prompting you to create the "Category Set".

Add the ID and Label which is the name of the set and click create.
Next, go to "Supplier Categories" and select the Category Set that you just created.

This will open the supplier categorie's page that are not mapped. Map them with the your categories that are created.
Once this done, you can use your new category set in the export file in the preference tab:
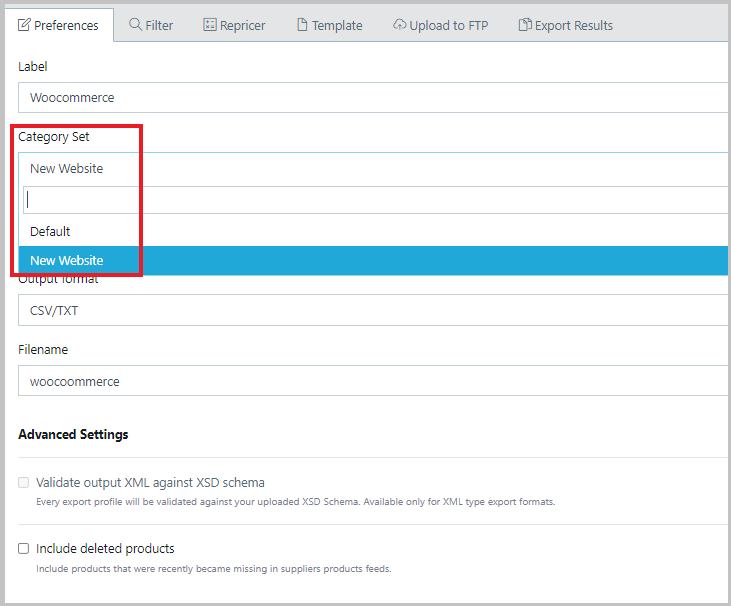
Some of your categories might have ID number which is already in use, especially in Woocommerce platform. Ask you developer to "incriment the category ID number" in the Woocomerce admin panel.
Setting category priorities
In some cases, one product can belong to a few categories. Here we will explain how to prioritize the categories in Wise2Sync.
One product belongs to a few categories
Some suppliers add one product to a few categories, for example, your product is in the "Sell Out" and "PC and servers components" categories.

For instance, you want to prioritize the "Sale Out" category.
Go to → Categories→My Categories→edit button.

In the priority field for the higher category add the highest number, let's say 100. That way this category in the export file will be exported first, followed by the next category.

If you are planning to prioritize more categories in the future make sure you leave gaps in between the numbers, so you could organize the priorities easily.